")
The hamstrings are a group of three muscles which are located at the back of our thigh: the semimembranosus, semitendinosus, and biceps femoris. These three muscles semimembranosus, semitendinosus, and biceps femoris play a vital role in various movements, including extending the hip and bending the knee, which are essential for activities like walking, running, and jumping.
Did you know that, Tightness or stiffness in the hamstrings is a common problem in today’s life which is often caused by factors such as prolonged sitting, lack of stretching, or physical activities that overuse these muscles without adequate recovery? Also, when you have a Tight hamstring it can lead to discomfort, reduced flexibility, and increased risk of injury, particularly in the lower back and knees.
So, yoga is one of the most effective methods for hamstring tightness which targeted stretching poses that gradually lengthen and release tension in these muscles. When you practice yoga regularly it just not only improves hamstring flexibility but also enhances overall lower body strength, balance, and posture.
With the cooperation of mindful breathing and relaxation techniques, yoga fosters a deeper connection between the mind and body, promoting better awareness of muscle tightness and the importance of maintaining flexibility for optimal physical health and well-being.
Table of Contents
Toggle10 yoga poses for Loosen up Your Hamstring
Here is the list of 10 yoga poses that help to Loosen up Your Hamstring
- Downward Facing Dog (Adho Mukha Svanasana):
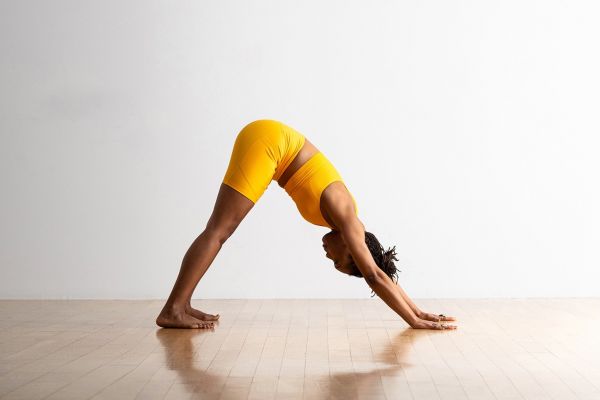
Downward Facing Dog (Adho Mukha Svanasana)- Source: Yoga journal - Start with your hands and knees in a tabletop position.
- Spread your fingers and press firmly into the yoga mat.
- Lift your hips up towards the ceiling, straightening your legs as much as you can.
- Press your heels down toward the mat.
- Keep your head between your arms and relax your neck.
- Deep breathing and Hold it for 30 seconds to 1 minute then release.
- Warrior II (Virabhadrasana II):
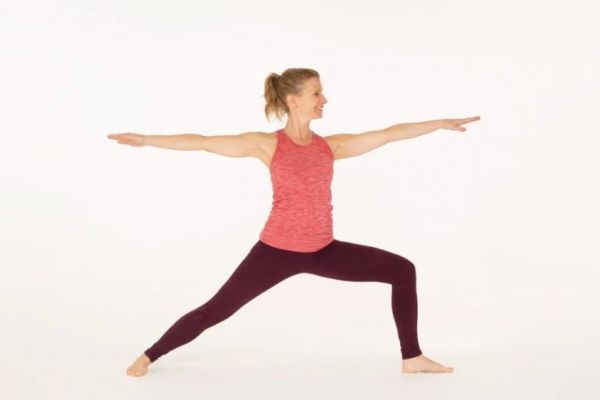
Warrior II (Virabhadrasana II)- Source: Ekhart Yoga - Stay in a standing position with your feet wide apart.
- Turn your right foot into 90 degrees and your left foot slightly inward.
- Bend your right knee directly over your right ankle, and thigh and parallel to the floor.
- Extend your arms out to the sides at shoulder height, palms facing down.
- Gaze over your right fingertips.
- Hold it for 30 seconds to 1 minute, then switch sides.
- Triangle Pose (Trikonasana):
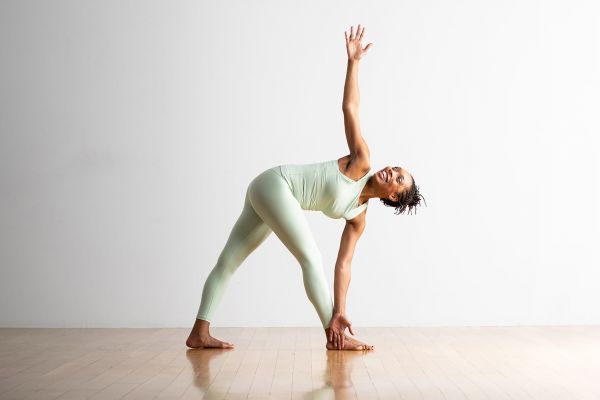
Triangle Pose (Trikonasana) – Source: Yoga Journal - For the second, start in Warrior II with your right leg forward.
- Straighten your right leg and reach your right hand forward as far as you can.
- Lower your right hand to your shin, ankle, or the floor to avoid placing pressure on the knee.
- Extend your left arm straight up toward the ceiling, palm facing forward.
- Keep your torso open and gaze up toward your left hand.
- Hold it for 30 seconds to 1 minute, then switch sides.
- Cow Face Pose (Gomukhasana):
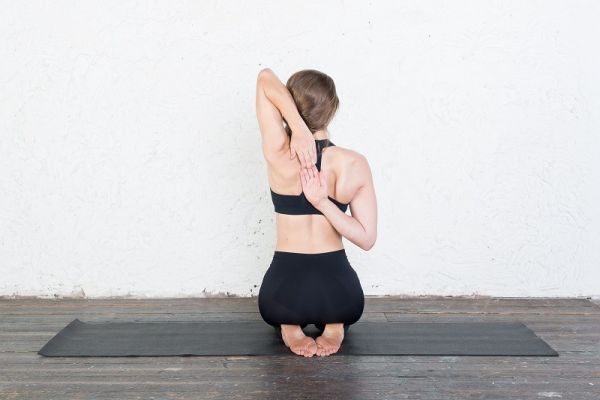
Cow Face Pose (Gomukhasana) – Source: Arhanta Yoga Ashrams - Sit on the floor with your legs extended in front of you.
- Bend your knees and your right knee on top of your left knee.
- Slide your feet outward, widening your legs into a “V” shape.
- Inhale and raise your right arm overhead, bend your elbow, and reach your right hand down your back.
- Exhale and reach your left arm behind your back, bending your elbow and reaching toward your right hand.
- Clasp your fingers together or use a strap if your hands don’t reach.
- Hold it for 30 seconds to 1 minute, then switch sides.
- Bridge Pose (Setu Bandhasana):
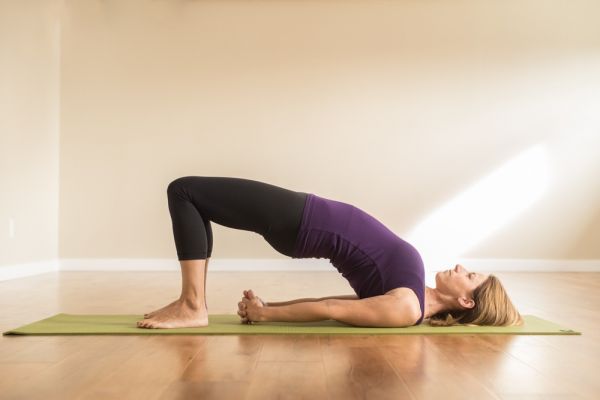
Bridge Pose (Setu Bandhasana) – Source: In Balance Health - Lie on your back with your knees bent and feet hip-width apart, close to your buttocks.
- Press your feet into the yoga mat as you lift your hips toward the ceiling.
- Slide your arms underneath your body and clasp your hands together, or keep your palms flat on the mat.
- Keep your thighs and feet parallel.
- Hold it for 30 seconds to 1 minute, breathing deeply.
- Seated Twist (Ardha Matsyendrasana):
Seated Twist (Ardha Matsyendrasana) – Source: https://artofliving.org/ - Sit on the floor with your legs extended.
- Bend your right knee and place your right foot outside your left knee.
- Keep your left leg extended or bend it and place your left foot near your right hip.
- Inhale and lengthen your spine, then twist to the right, placing your left elbow outside your right knee.
- Hold your right knee with your left hand and place your right hand on the floor behind your back.
- Hold it for 30 seconds to 1 minute, then switch sides.
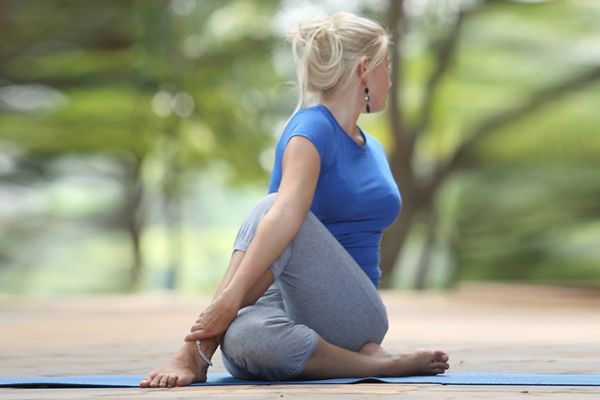
- Pigeon Pose (Eka Pada Rajakapotasana):
Pigeon Pose (Eka Pada Rajakapotasana)- Source : Yoga by D - Begin in a tabletop position.
- Bring your right knee forward toward your right wrist, then angle your right shin under your torso and extend your left leg straight back.
- Lower your hips toward the floor.
- Walk your hands forward and lower your upper body toward the floor.
- Keep your hips square and level.
- Hold it for 30 seconds to 1 minute, then switch sides.
- Legs-Up-the-Wall Pose (Viparita Karani):
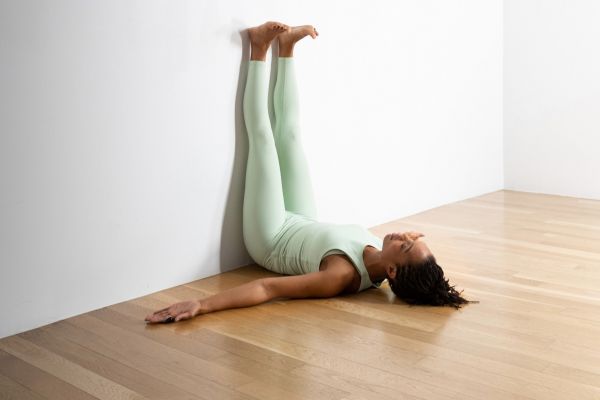
Legs-Up-the-Wall Pose (Viparita Karani) – Source :
Yoga Journal- Sit close to a wall with your hip touching it.
- Lie down on your back and swing your legs up onto the wall.
- Scoot your buttocks as close to the wall as comfortable.
- Keep your arms by your sides, palms facing up.
- Relax and breathe deeply.
- Hold it for 5-10 minutes, or as long as comfortable.
- Child’s Pose (Balasana):
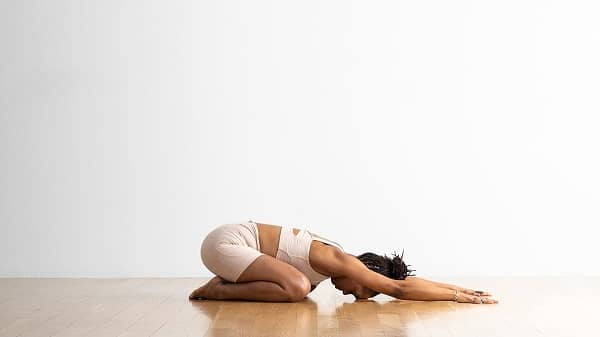
Child’s Pose- Source: yoga journal - Kneel on the floor with your big toes touching and knees wide apart.
- Sit back on your heels and lower your torso between your thighs.
- Extend your arms forward, palms facing down.
- Rest your forehead on the mat (or a block if more comfortable).
- Hold it for 1-3 minutes, breathing deeply.
- Happy Baby Pose (Ananda Balasana):

Happy baby pose (ananda balasana) - Lie on your back and hug your knees into your chest.
- Grab the outsides of your feet with your hands, positioning your hands on the soles of your feet.
- Open your knees slightly wider than your torso and bring them toward your armpits.
- Gently pull down on your feet, encouraging your knees toward the floor beside you.
- Hold it for 30 seconds to 1 minute, rocking gently from side to side if desired.
- Wide-Legged Forward Fold (Prasarita Padottanasana):
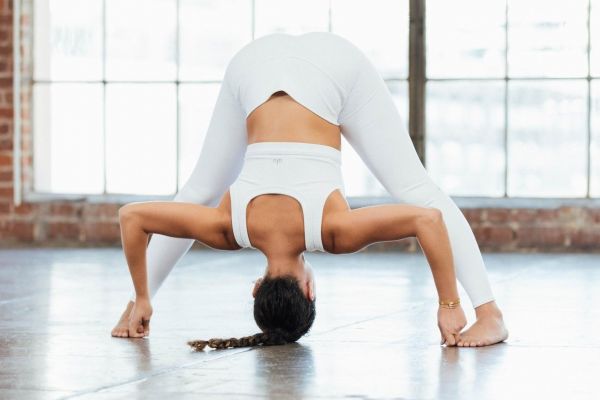
Wide-Legged Forward Fold (Prasarita Padottanasana) – Source: Alo Moves Blog - Start standing with feet wide apart.
- Inhale and lengthen your spine.
- Exhale and hinge at your hips, folding forward.
- Bring your hands to the floor directly below your shoulders or hold onto your ankles.
- Keep your legs straight and active, pressing into the outer edges of your feet.
- Hold it for 30 seconds to 1 minute, breathing deeply.
- Reclining Hand-to-Big-Toe Pose (Supta Padangusthasana):
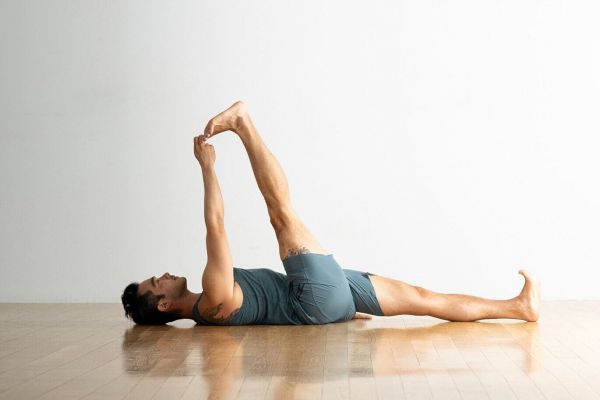
Reclining Hand-to-Big-Toe Pose (Supta Padangusthasana) – Source :Yoga Journal - Lie on your back with legs extended.
- Bend your right knee and bring your thigh toward your chest.
- Hold the big toe of your right foot with your right hand.
- Extend your right leg toward the ceiling, keeping it straight.
- Hold for 30 seconds to 1 minute, then switch sides.
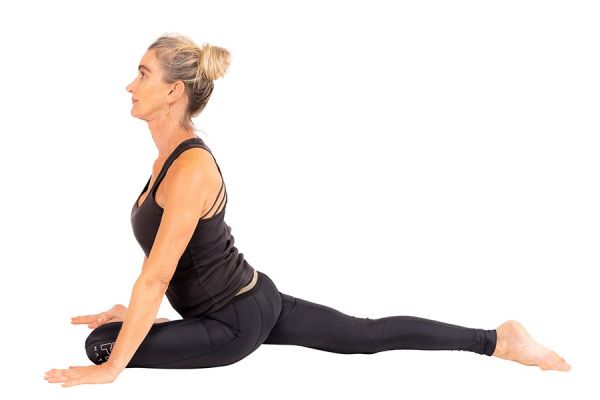
- Half Splits Pose (Ardha Hanumanasana):
- Start in a kneeling position.
- Extend your right leg forward and flex your right foot.
- Keep your hips squared and begin to straighten your right leg, folding forward over your right leg.
- Support your hands on blocks or the floor beside your hips.
- Hold it for 30 seconds to 1 minute, then switch sides.
- Standing Split (Urdhva Prasarita Eka Padasana):
- Start in a standing position.
- Shift your weight onto your right foot and lift your left leg straight back and up.
- Keep both legs straight and engage your core for balance.
- Hold your left ankle or calf with both hands.
- Hold it for 30 seconds to 1 minute, then switch sides.
- Revolved Head-to-Knee Pose (Parivrtta Janu Sirsasana):
- Sit with your right leg extended and left foot against your inner right thigh.
- Inhale and lengthen your spine.
- Exhale and twist your torso to the right, bringing your left arm across your right leg.
- Hold your right foot or ankle with your left hand.
- Extend your right arm toward your foot or the floor.
- Hold it for 30 seconds to 1 minute, then switch sides.
Benefits of doing yoga for Hamstring
As you already know that, there are plenty of benefits of doing yoga for the Hamstrings offers numerous benefits for overall health and well-being. Here are some of the key benefits:
- Flexibility: Some Yoga poses like Paschimottanasana and Uttanasana gradually stretch and lengthen the hamstring muscles, improving their flexibility over time. This increases flexibility and can enhance the range of motion in the hips and lower back, which makes everyday movements easier and more comfortable.
- Reduced Muscle Tension: Tight hamstrings often contribute to muscle tension in the lower back and hips. Some Yoga mentioned above helps to alleviate this tension by releasing tightness in the hamstrings through gentle, sustained stretches. This can alleviate discomfort and promote relaxation in the affected areas.
- Improved Muscle Strength: Yoga poses for hamstrings also strengthen the surrounding muscles, including the calves, quadriceps, and glutes. This balanced strengthening can provide better support to the hamstrings, reducing the risk of injury.
- Enhanced Posture and Alignment: Tight hamstrings can contribute to poor posture and spinal misalignment. Regular practice of these yoga poses can target the hamstrings and encourage proper alignment of the spine and pelvis, promoting better posture both during yoga practice and in daily life.
- Prevention: Flexible and strong hamstrings are less prone to injury, particularly strains and tears that can occur during physical activities or sudden movements. Yoga helps the condition of hamstrings, making them more resilient and adaptable to various stressors.
- Mind-Body Connection: Yoga emphasizes mindful breathing and body awareness, which can help individuals tune into sensations and tensions within the body, especially the hamstrings. This heightened awareness allows practitioners to practice yoga with greater mindfulness and reduce the risk of overstretching or straining muscles.
- Stress Relief: Yoga practice, which includes poses for hamstrings, promotes relaxation and reduces stress levels. The combination of physical movement, breath awareness, and meditation techniques can calm the nervous system, leading to overall feelings of well-being and relaxation.
FAQs
How often should I practice Paschimottanasana to see results?
Practising Paschimottanasana for a week along with an other regular yoga practice can gradually improve hamstring flexibility.
What is the best yoga pose to loosen up tight hamstrings?
How does Paschimottanasana benefit the hamstrings?
Paschimottanasana stretches the entire back side of the body, including the hamstrings, calves, and lower back.
Also, read more about Yoga for Better Sleep: Poses and Practices to Enhance Relaxation