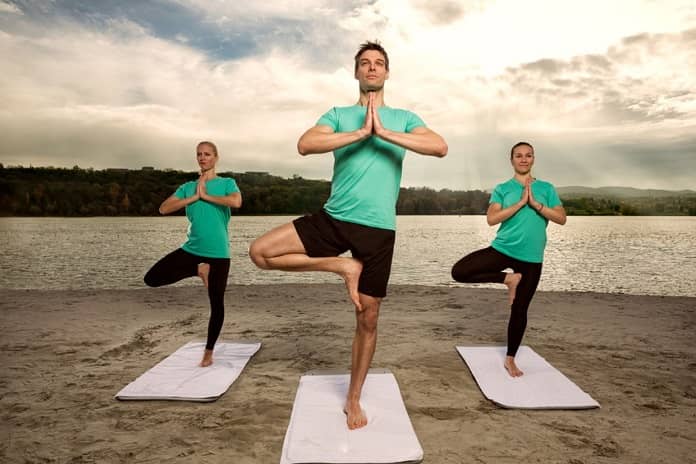
Yoga is not only done to achieve physical fitness but also it cultivate self-awareness, reduce stress, and promote mental clarity. Yoga helps us to balance our flexibility and relax our mind. The Sanskrit word for yoga is Yoke or Union. Yoga is a holistic practice that originated in ancient India and combines physical postures (asanas), breathing techniques (pranayama), and meditation to promote mental and physical well-being.
We can practice many types of yoga, but in this article, we have listed 8 yoga poses for beginners.
Yoga Poses for Beginners
1. Mountain Pose (Tadasana)
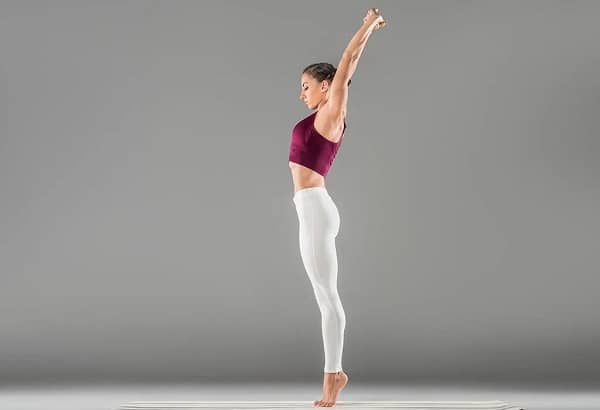
Mountain pose yoga which is also known as Tadasana. In sanskirt word ‘tada’ means ‘palm’ or ‘mountain’ and ‘asana’ signifies ‘posture’ or ‘seat’. This yoga pose helps to improve posture and balance.
FirstCry Parenting
Step-by-step guide: Mountain yoga pose
Step 1: Stand still while keeping a distance of 2 inches between your feet.
Step 2: Lift your arms in front and inhale at the level of your shoulders.
Step 3: Cross the fingers of both hands together and then slowly rotate your wrist inside.
Step 4: Next, inhale and then lift your hands on the head.
Step 5: While lifting your hands on the head also lift your heels off the ground by balancing your entire body weight on the toes.
Step 6: If you are comfortable hold this position for 20 – 30 seconds or as long as you can.
Step 7: Lastly, slowly release this position relax and get back to the initial position
2. Child’s Pose (Balasana):
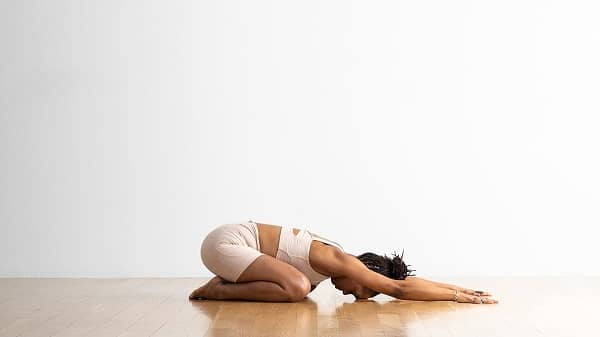
Chid Pose is another simple yoga pose which is also known as Balasana where bala means child and asana means posture or seat. This Yoga pose is really helpful for gentle stretch for the shoulders, back, hips, thighs, neck, and ankles and also helps to relieve back pain.
Step-by-step guide: Chid Pose pose
Step 1: Keep your kneel on the mat with your big toes touching and keening hip-width apart.
Step 2: Sit back on your leg heels and extend your arms forward resting your forehead on the mat.
Step 3: While doing this relax your whole body and focus on your deep breaths into your lower back and ribs.
Step 4: Hold this position for 1-3 minutes, focusing on relaxation and release.
Step 5: Slowly get back to your initial position relaxing your body.
3. Cat-Cow Pose (Marjaryasana-Bitilasana)
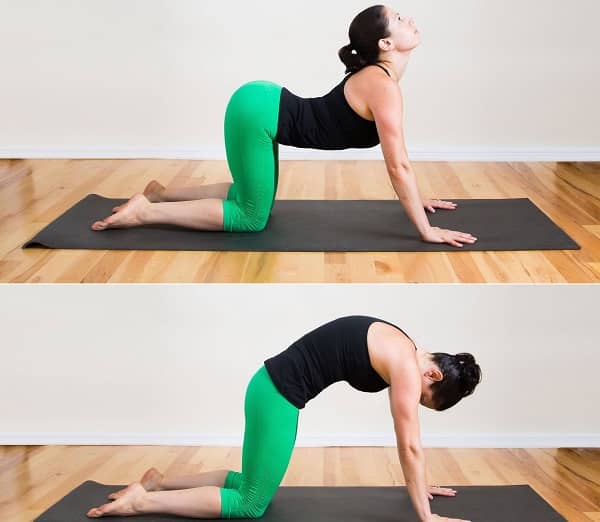
This is another one of the simple yoga poses where the Sanskrit word Marjari means cat and Bitala means cow. Both cat-cow pose is done on fours, by placing the plans and the keens on the mat. This pose Bitilasana helps to strengthen the spine, and back of the shoulders, and stretches the front of the shoulders, chest, core and back of the hips. Similarly, the pose Marjaryasana helps stretches the spine, and back of the shoulders, and strengthens the front of the shoulders, chest, core and back of the hips.
Step-by-step guide: Cat-Cow Pose
Step 1: Hand and knees in a tabletop position with wrists under shoulders and knees under hips.
Step 2: Inhale when you arch back dropping your belly downwards the floors and lifting your gaze.
Step 3: Exhale when you round your spine tuck your chin towards your cheat and get your belly button towards your spine.
Step 4: Repeat this process for around 5-10 rounds and cooperate with your breath while doing this.
Step 5: After you feel stretched come back to your initial pose.
4. Downward-Facing Dog (Adho Mukha Svanasana)
This yoga pose downward-facing dog is also known as Adho Mukha Svanasana. In Sanskrit, Adas means down, mukha means face savana means dog and asana means posture or seat. This yoga strengthens the upper body, arms, shoulders, abdomen and legs and calms the mind.
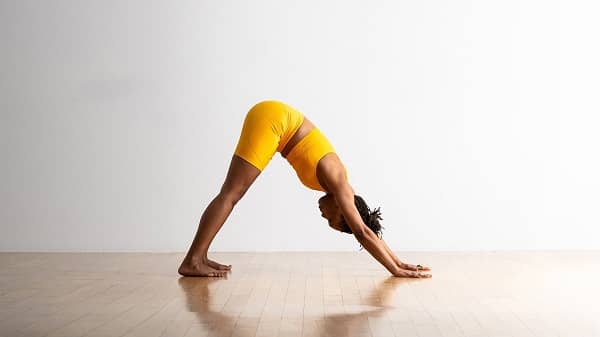
Step-by-step guide: Downward-Facing Dog
Step 1: While doing this yoga start on your hands and knees in a tabletop position
Step 2: Fold your toes under, lift your hips towards the ceiling straighten your legs and form an inverted V shape.
Step 3: Pressing your hand into the mat lengthen your spine and engage your core.
Step 4: While doing this you may feel relaxed in your head and neck and aim to bring your heels towards the floor.
Step 5: Stay in this position and hold for 30 minutes to 1 minute focusing on deep breaths and lengthening through your spine.
Step 6: After you feel relaxed get back to your initial position.
Note: Beginner may not touch their heels towards the floor.
5. Corpse Pose (Savasana):
One of the easy yoga poses corpse pose known as Savasana. The Sanskrit term of Savasana is Sava means Corpse and Asana means posture or seat.
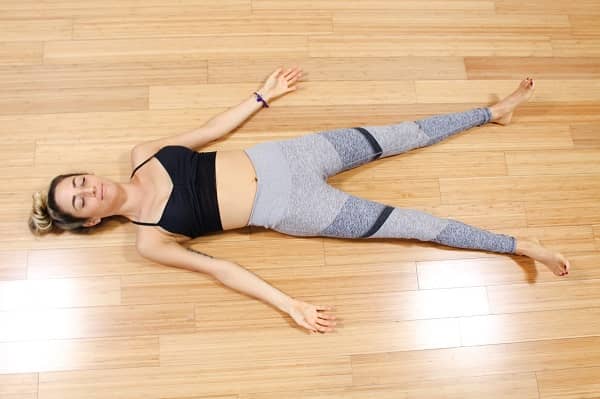
Step-by-step guide: Corpse Pose
Step 1: Lie back on the mat and keep sides your arms placing palms facing up and legs extended comfortably.
Step 2: Close your eyes relax your whole body and release and make tension-free muscles
Step 3: Then focus on an inhale and exhale process and breathe slowly and steadily.
Step 4: Stay in this position for about 5-10 minutes make clear and free mind and simply enjoy the yoga.
6. Warrior I (Virabhadrasana I)
Warrior I pose yoga which is also known as Virabhadrasana I. Virabhadrasana I is a Sanskrit term of two words Vira means hero, and bhadra means friends. This pose helps to strengthen the legs, core, and glutes.
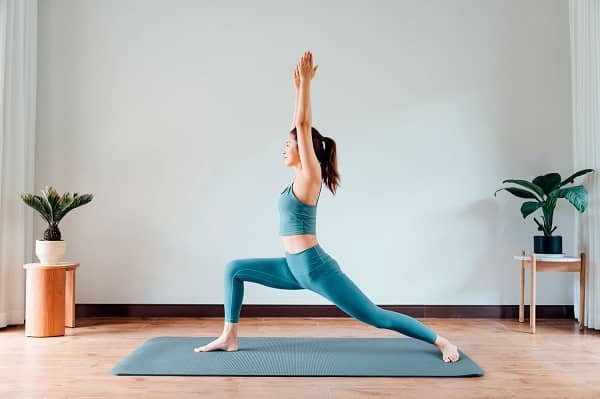
Step-by-step guide: Warrior I yoga pose
Step 1: Stand at the front with your feet hip-width distance apart lift your chest and roll your shoulders back.
Step 2: Go back with your left leg aligning your left heel with your right heel.
Step 3: Rotate your left toes away from you at the degree of 45 angle.
Step 4: After that, square your hip points to the fronts of the mat by bringing your left hip forward and then moving your right hip back.
Step 5: Then bend your right knee and lower to the point of a 90-degree angle and make it comfortable as much as you can.
Step 6: Inhale after you lift your arms overhead and keep them straight with your palms facing each other.
Step 7: Then after dropping your shoulder blades down keep away from your ears and keep your core engaged.
Step 8: Make sure that your hips and torso are facing forward and direct your gaze forward.
Step 9: Hold this position for 2-3 minutes and breathe slowly inhaling through your nose and exhaling through your mouth.
Simple Yoga Poses for Partner
1. Double Tree Pose (Partner Vrksasana)
These are simple yoga poses for a partner or they can also be said to beginner-level yoga poses which are performed in standing with one-legged positions. The word vrkasana is derived from Sanskrit where vrksa means tree and asana means posture.
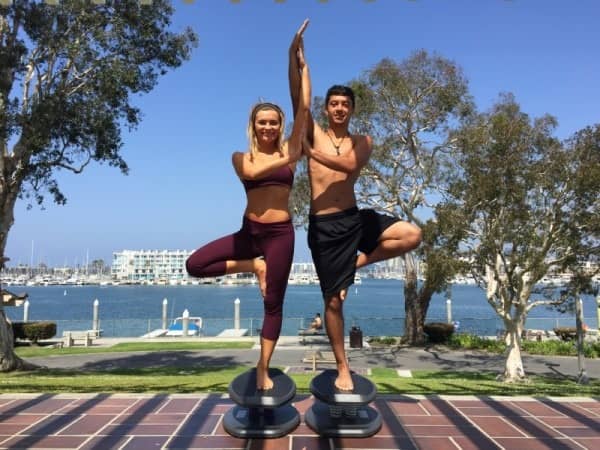
Step-by-step guide: Double Tree Pose (Partner Vrksasana)
Step 1: For this yoga step you need to stand straight facing each other partner about arm’s distance apart.
Step 2: Both the partners need to lift one foot and place the sole against the inner thigh of the opposite leg
Step 3: After that join the hand or place them on each other’s shoulders for balancing.
Step 4: Hold this pose and and balance together focusing on a single point ahead.
Step 5: After one side is done switch it to other side and hold this position for 2-3 minutes.
2. Seated Forward Fold (Partner Paschimottanasana)
Pashimottanasana is one of the stretching yoga where paschima means “west” or “the back of the body” uttana means “intense stretch” or “straight” or “extended” and asana means posture or seat.
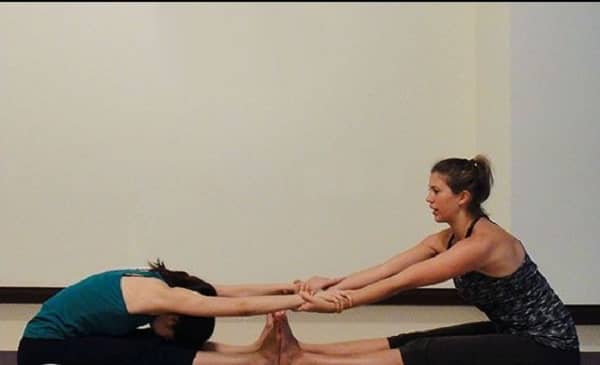
Step-by-step guide: Seated Forward Fold (Partner Paschimottanasana)
Step 1: Hold your hands with your partner and lengthen your spine.
Step 2: Both partners hinge at the hips and fold forwards and then exhale keeping your backs straight.
Step 3: Stretch the deepen and get relax into the pose.
Step 4: Try to make good communication with your partner to find a comfortable depth for the stretch.
Step 5: Hold the breathes and focuses on the inhale and exhale process and hold this pose for 1 minutes
Step 6: After you feel release get back to your initial position.
FAQs
What is the Sanskrit words for yoga?
The Sanskrit word for yoga is Yoke or Union. Yoga is a holistic practice that originated in ancient India and combines physical postures (asanas), breathing techniques (pranayama), and meditation to promote mental and physical well-being.
What is the Sanskrit word for Mountain Pose and what are its benefits?
Mountain pose yoga which is also known as Tadasana. In sanskirt word ‘tada’ means ‘palm’ or ‘mountain’ and ‘asana’ signifies ‘posture’ or ‘seat’. This yoga pose helps to improve posture and balance.
Is it normal that my heels don’t touch the ground while doing Downward-Facing Dog?
Yes it is normal especially for beginners. While doing focuses on lengthening your spine and pressing your palms into the mat.
What is Cat-Cow pose and what are its benefits?
Cat-Cow pose is another one of the simple yoga poses where the Sanskrit word Marjari means cat and Bitala means cow. Both cat-cow pose is done on fours, by placing the plans and the keens on the mat. This pose Bitilasana helps to strengthen the spine, and back of the shoulders, and stretches the front of the shoulders, chest, core and back of the hips. Similarly, the pose Marjaryasana helps stretches the spine, and back of the shoulders, and strengthens the front of the shoulders, chest, core and back of the hips.
Also, read more about “Yoga for Better Sleep: Poses and Practices to Enhance Relaxation”
